Description:
The OverlayImage let you overlay an image of your choosing on the specified image. This is very similar to the OverlayText import option. You control placement, optional resizing and transparency.
Declaration:
OverlayImage:<filename> [, <where>, <transparent>, <X>, <Y>, <ResizeMethod>, <transparent color>, <tolerance>
Parameters:
Param |
Description |
<filename> |
Full path and file name to overlay image. Note that this can be an entirely other image format than the original image. Starting from version 1.4 of II2LN you can also specify any |
<where> |
Control where you want to place the image. The placement number range from 0 (Upper/Left) to 8 (Bottom/Right), with the exact same logic as the <where> parameter for the OverlayText. See The <where> parameter. |
<transparent> |
From 0 (invisible) to 100 (solid). See The <transparent> parameter on OverlayText. |
<X> and <Y> |
If you want to resize the overlay image to fit within the X and Y parameters, specify <X> and <Y>. See more on X and Y specification below. |
<ResizeMethod> |
If you specify the <X> and <Y> you can optionally impose a resize method for the overlay image. If the value is The resize method number is the same as you set with the SetResizeMethod import option. |
<transparent color> |
If your overlay image contains areas that should be transparent on the import image, you can use this parameter to specify the color that should act as a transparent color. Specify the color according to the How to specify colors ?. |
<tolerance> |
If you specify the <transparent color> parameter above, you can even specify the color-tolerance to use. The default value is 0 which means strict color matching. If you for example specify the color Magenta (FF00FF), this can be the one and only color being used as a transparency color. If you increase the <tolerance>, you can embrace more and more colors similar to FF00FF. The upermost limit is 65535, which means ALL colors are used, and the overlay image then becomes completely transparent! |
More on how to specify the <X> and <Y> parameters.
If you specify X and Y parameters equal to -1, you indicate to II2LN to resize the overlay image to the same size as the original image. In other words, the overlay image will overlay the complete imported image.
If you specify X and Y parameters equal to 0, you indicate to II2LN to use the original size of the overlay image. You may need to do so, in order to being able to specify some of the other optional parameters.
A sample:
We have the original digital camera JPG image with original dimensions 2240 x 1680:
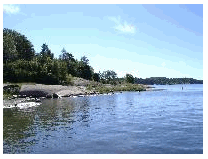
The image above will be resized to 200 by 200 pixels.
Then we have a logo we want to superimpose onto the image above. The logo is a GIF file with original dimensions 374 x 384:

As you see the logo is circular, with some white space around the logo.
Our first attempt to overlay the logo on the image uses this import options string:
"Resize:200,200;OverlayImage:c:\temp\Logo.gif,2,100,50,50,7"
The import option string above will first resize the original image, and then overlay the logo. The OverlayImage will place the logo in the upper right corner (2), have solid transparency on, and resize the logo to 50 by 50 pixels with resize method 7. Our first result looks like this;
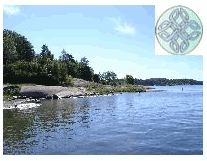
The logo is resized and placed in the upper right corner, but the white space in the logo GIF file is still visible. We specify the additional <transparency color> parameter and end up with an import option string like this:
"Resize:200,200;OverlayImage:c:\temp\Logo.gif,2,100,50,50,7,FFFFFF"
The result looks like this;
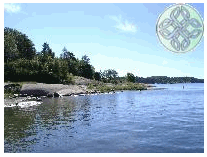
Now the white space around the logo has been transparent! Cool!
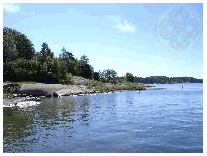
The final test adjust the <transparent> parameter to impose a more professional look for the logo:
"Resize:200,200;OverlayImage:c:\temp\Logo.gif,2,25,50,50,7,FFFFFF"
Below you see the result of the import options above;
Introduced in version:
1.2.0.0
Repeatable
Yes